THIS TUTORIAL IS OUTDATED! Version 2.0 can be found hereIf you've ever said the words "I wanna make my own fangame" (pun intended), but have NO idea how to get started, then you're in the right place! I'm gonna try and go over all the basic information on Game Maker and fangame engines required to make your own fangame. This is by no means a comprehensive tutorial, it's just enough to get you on your feet. But after this tutorial, you should be able to start asking the right questions!
Note: screenshots of the editing process are included in the tutorial as "Spoilers". Just click the "Spoiler" button to see them!
Table of Contents:
Environment Setup: Get your computer ready to design fangames!
Learning the Basics: Try the example game provided with the engine!
Sprites: The images and animations in your game!
Objects: The actual "things"! Learn to code!
DnD Actions: Simple and Abstract
Script Actions: Complex and Powerful
Backgrounds: Because no one wants to play a game with a spring green background!
Sounds: Repeating guy rock? No thank you!
Rooms: The actual platforming and level design!
Advanced Topics: How the pros do it!
Changing Rooms: For games longer than one level!
Triggers: Who doesn't love a good troll trap every once in a while!
Non-Restarting Music: Pretty self explanatory
Bosses: It gets serious from here!
Giving your boss HP: So you can kill it, of course!
Boss Movement: Gotta go fast! (not done yet

)
Boss Attacks: Get Rekt! (not done yet
)
Targetted Apples: Shooting at the player
Apple-splosions: Rings of apples are dabes
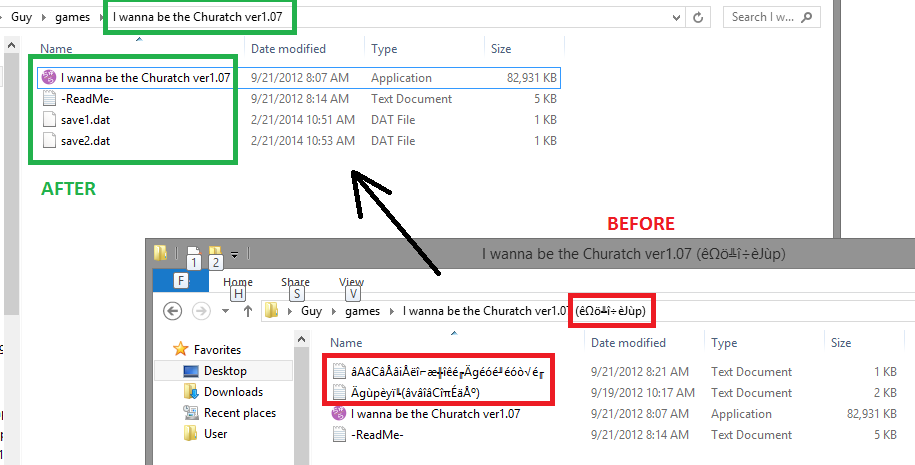
Environment SetupAlright, the first step in development is to get yourself set up with the tools you need. Most guy games (IWBTG and Boshy being the biggest counterexamples) are made using a program called Game Maker (hereby referred to as GM), from the company YoYo Games. The current version of GM is known as GM Studio, but don't go download that just yet...
A few kind developers have released "engines", or pre-made Game Maker game files, that already have all the physics ironed out for you. Unfortunately, the good engines are not made for GM Studio, but rather for an older version (Game Maker 8.1). So, in order to make fangames using these engines, you'll need to get GM 8.1. This version is out of production, so you'll have to find that on your own. We cannot provide you with a link for it. We can, however, provide you with links to the engines:
PLEASE do not use any engine but the ones above. All the good players are used to these physics; using a different engine will just piss them off

For this tutorial, we'll be using the Yuuutu edition (for the sole reason that it's what I'm currently using; I recommend using the Lemon edition when you really get started).
So now you should have downloaded and installed GM, and have downloaded one of the engines (Yuuutu). Open the engine file in GM (unzip it first if it's in a ZIP file!). Now we can get to work!
Learning the BasicsAfter opening the engine in GM:
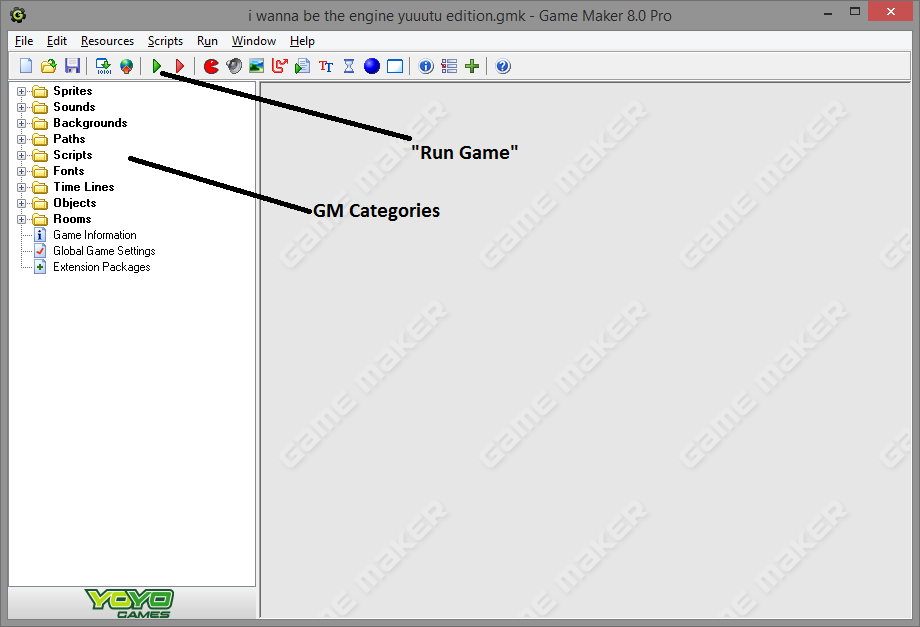
As a beginner, the very first thing you should do is run the sample game included with the engine and see what you're about to be dealing with. Run the game by pressing the green arrow on the toolbar at the top of the screen, or by pressing F5. It will start in traditional fangame fashion, and you can test it out for yourself. Why is it so important to play the sample game, you ask? Well, it's because we'll be modifying it, and I want you to know what everything is like before our modifications so you can see the effects.
Once you've had enough fun with the sample, press "Esc" to quit and be dumped back at the GM window.
At first, the GM interface can be daunting, but it's all divided up into easy-to-grasp sections, which you can see on the left of the window. Let's walk through these sections and see what's going on.
Sprites"Sprite" is just fancy game developer lingo for an animated image. You'll use sprites for anything that isn't part of the background, or that may move in-game (think cherries, spikes, the player, bosses, etc). If you open the Sprites folder, you'll see a bunch of subfolders, which the engine developer made for you (you can make your own by right-clicking and choosing "Create Group"; same for making a new Sprite). Open up the "random threats" folder, and double-click the "sprSpikeUp" Sprite to open the Sprite Properties window.
The Sprite Properties window allows you to modify the sprite. Click Edit Sprite to get the Sprite Editor window. Hover over all the buttons on the toolbar to figure out what they do. We'll be making an animated spike to get accustomed to the editor, so select image 0 (the spike image), and then click the copy button (the two sheets of paper) and the paste button (clipboard with paper) to create a second image frame (yes, ctrl-c/ctrl-v works). Go ahead and check the "Show Preview" box on the left too. The image you see is animated, but it doesn't look special yet because both frames of animation are the same. Let's change one to see what it does.
Sprite Editor:
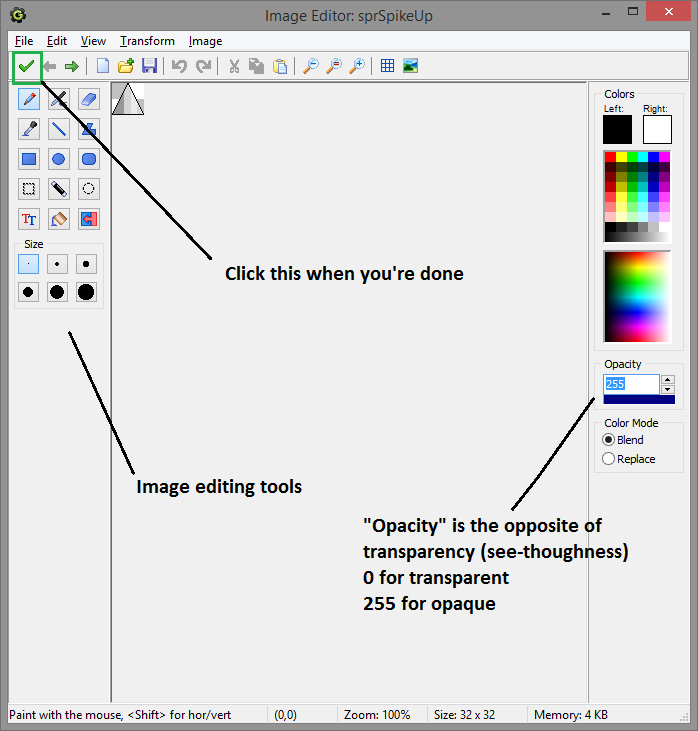
Select image 1, and then click the pencil button on the toolbar to open the Image Editor. This isn't an image editing tutorial, so I won't go into detail, but go ahead and make something of the spike. Do whatever you want, I'll wait for you
Once you're done playing with the image editor, click the green checkmark button at the top left to save the image.
Image Editor:
Back at the sprite editor, you should see a rapidly-flashing animation of your new spike on the left. Change the "Speed" from 30 to something lower for a less epilepsy-inducing animation (like it says, this speed is only for the preview, we'll correct this in-game later). Press F5 to start the game, and go find a spike. You'll see it flashing like crazy. Be proud! You've just made your first animated spike, and are well on your way to crafting your own HD Spikes

We'll fix the crazy flashing in the next section, Objects.
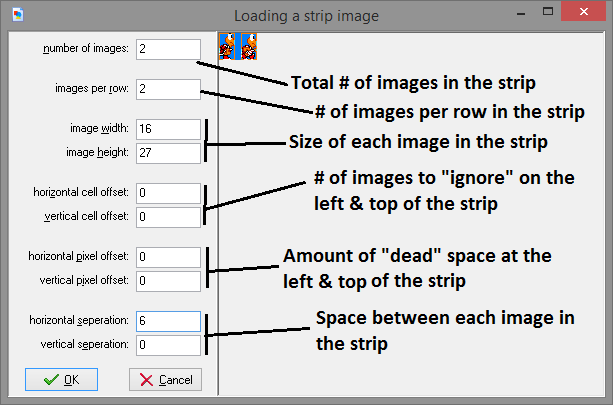
Already have some images you want to put in your game? Try File->Add From File. Got a single image with multiple frames of animation that you want to split and add all at once? Try File->Create From Strip. Anything else you'll have to Google for help; that's beyond the scope of our tutorial.
Create From Strip:
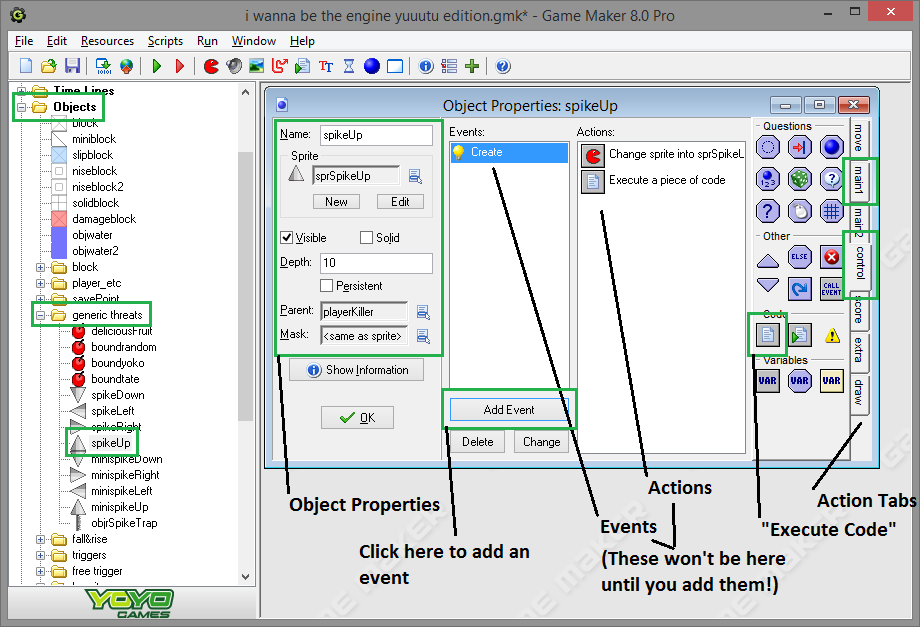
ObjectsObjects are the actual "things" in your game. They use sprites as their images, and their behaviour is determined by code you write (don't freak out just yet!). We just edited the sprite of the upwards spike, so let's open that object to fix the animation flashing. Open the Objects folder, then the generic threats folder, and finally double-click the spikeUp object. You'll get the Object Properties window, much like you got the Sprite Properties window when you double-clicked the spike sprite (see, it makes sense!).
On the left, you'll see a bunch of parameters for the object:
- Sprite: allows you to specify the sprite for the object. Clicking the name "sprSpikeUp" will bring up a list of sprites you can change to, but don't do that here.
- "Visible" and "Solid" checkboxes: determine if the object is visible and solid when it is first created in-game.
- Depth: determines the drawing order, with high values at the back, and low numbers in front (negative numbers are allowed). The depth of this spike is 10, which means that anything with a depth of 11 or higher shows up behind the spike ingame, and anything with a depth of 9 or less will be in front of the spike.
- Persistent: basically means "keep this object alive even if you leave the room", don't check this unless you have a very good reason (you don't).
- Parent: Specifying a Parent object makes this object "inherit" all behaviour from the parent - you can see here the spike is a child of "playerKiller"; any child of playerKiller will kill the kid on contact (playerKiller itself is an object in the engine - you can go look at it for more information).
- Mask: The mask allows you to specify a sprite which acts as the "collision box". For instance, if you create a spike that isn't the exact same size as a regular spike, but want it to act exactly like a regular spike, use a regular spike sprite for the mask. You typically won't need to do this though.
The real meat of the object editor is in the Event/Action lists. This allows you to specify behaviour for the object. It's a cause & effect system: when an "event" happens, it performs a set of "actions". On the far right, you can see all the actions you can perform. It'll take a while, but you'll learn them if you keep trying. All of these are known as "Drag and Drop" actions, or "DnD" (helps to know this when you're Googling for help). For more advanced control, you'll need to actually write code. We'll fix the spike animation using both DnD and code, so you can see both in action.
But first, I want to make a small note about terminology. When talking about objects, you'll often hear the word "instance" used. You may not know what that means, or at least not what it means in programming lingo, but it's real simple. Think of an "Object" as a prototype, or blueprint, or set of instructions, from which you can create any amount of "Instances". GM gives you a special section to code for each individual instance, called Instance Creation Code. For example, if you have a moving platform that can go anywhere as the object, in the instance creation code you can specify the direction and speed for that particular platform. We'll revisit this topic later in "Rooms".
DnD ActionsBack to fixing our spike. First, we need to specify an event. We want to specify an "animation speed" for every instance of the spikeUp object. How can we do this? Why not have the game do it every time it creates an instance? Add a Create event with Add Event->Create. Now, select the Create event. The Actions list on the right now lists all the actions that happen at instance creation (none yet!). Click the "main1" tab on the right, and drag the "Change Sprite" action (the red Pacman) into the Actions list. In the action properties window, select the sprSpikeUp sprite from earlier, leave subimage as 0 (remember image 0/image 1 from the sprite editor? This field specifies which image we start at), and for speed type this exactly: 1/room_speed
Sprite Change Action Window:
Technical information warning! "room_speed" is one of GM's built-in variables. Its value is the number of "ticks", or updates, that the game performs per second. You should never need to change this, but in the Yuuutu engine, it's 50. The "speed" is added to a counter behind-the-scenes every second, and the value of this counter determines which image of the sprite is to be drawn. This means that every "tick", 1/50 is added to the image counter, and since 50 "ticks" happen per second, the counter increases by 1 every second. If the counter goes past the number of images in the sprite, it just goes back to 0 and keeps going. So we get animation at one frame per second!
That's all you have to do to fix the animation! Go start the game again, and look at the spikes. Every second, they'll switch back and forth between the images you made in the sprite editor. If it's too slow for you, try raising the speed (2/room_speed would be 2 frames per second, 3/room_speed is 3, etc.) Also try adding more animation frames to make it look cooler!
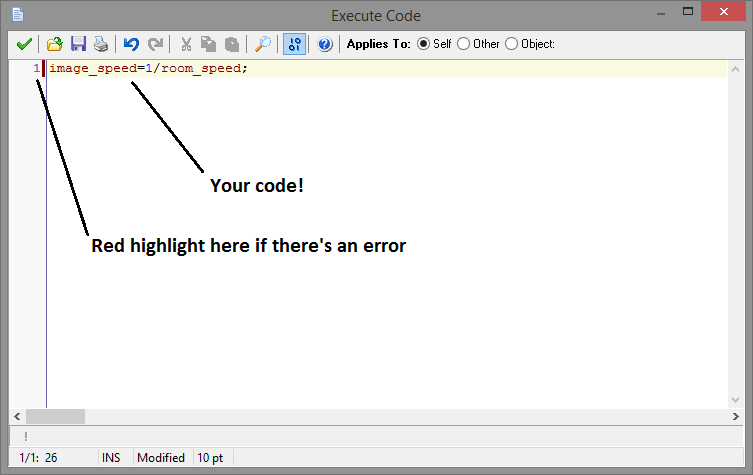
Script ActionsOk, that was the drag-and-drop tutorial. But for anything interesting, you'll need to delve into the code... so you might as well learn now! Code is added to actions just like the other DnD actions; go to the "Control" tab in the Object Properties window, and drag the "Execute Code" action (the piece of paper) into the Actions list. Brace yourself, because it will immediately open the Execute Code script editor. Luckily, all we are trying to do here is fix the image speed, so it'll take just one line of code. And... here... it... is:
image_speed = 1/room_speed;Execute Code Action Window:
Not bad, huh? Notice how the words "image_speed" and "room_speed" are both red? That means GM recognizes them as special variables, like I mentioned before. There will be a red highlight to the left of the text if you messed it up, so make sure you copied it exactly! Hit the green checkmark to save the script, and then, back at the Object Properties window, click the old DnD action in the list, and press the "Del" key to delete it. Now, there's only code controlling your object; let's go see how it does. Oh, what's that you say, it worked great? Good. Well, that's all I have to tell you about scripting, but
PLEASE go read the GML (Game Maker Language) Reference at
https://docs.yoyogames.com/source/dadiospice/002_reference/index.html to learn more about GML, the functions and variables you can use, and what you can do with it.
Tutorial continues in next post...


 Game Maker Studio has a free version, so you can install that to load the project - no need to go hunting for a
  version of GM8.1!